Selenium Webdriver 2.0 is a very popular Automation Testing tool for Web based Applications. These days most of the Software companies are using or trying to use and implement Selenium in their Testing Process.
Selenium Webdriver is nothing but set of API which can be used to automate your web Application very fast and easily.
So lets Start and Create our First JAVA Programme using Selenium Webdriver !!!!!
1. Eclipse http://www.eclipse.org/downloads/
2. JDK http://www.oracle.com/technetwork/java/javase/downloads/index.html
3. Selenium Webdriver Jar file http://selenium.googlecode.com/files/selenium-java-2.33.0.zip
4. Firefox Browser should be installed.
That's It !!!!!!!!!!!!!!!!!!!!
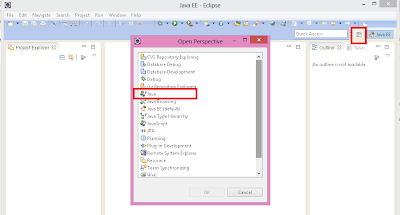
Select the Java Prespective from the List of Different Prespectives, like below...
Click File -> New -> Java Project
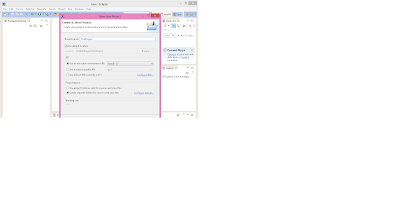
Now You can see a New Java Project Dialog is open.
Enter Java Project you want to create like Example: FirstProject and Click Finish...
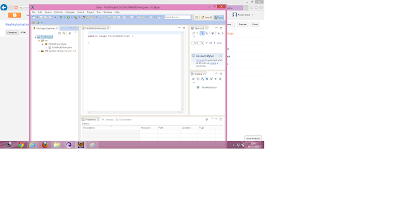
Now You have Successfully create a Project you can see that on you Package Explorer View.
Select the Java Project -> Right Click -> New -> Class
Enter the Name of the Class File You want to create like Example: FirstWebDriver and click Finish..
After Finish You can see Default Package With the Class you have given is Created.


Note: to use webdriver API in you programme you need to include the Selenium webdriver jar file to your Build path of Eclipse.
Select You Project -> right Click-> Build Path-> Configure Build Path...
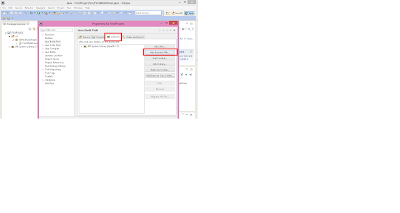
You can see the Properties for you Java project dialog is open..
Select libraries TAB and then Click -> Add External JARS....
Now You need To give the Selenium Webdriver JAr file Path you have already downloaded in your machine and click OK.....
Great !!!! We are Almost ready to Start with the Programme...................
So Selenium Webdriver Jar file Path is Set and we can use the methods, So lets START...........
First let me tell you ,What we are going to Do in this First Basic Programme...
1. You are going to use Webdriver to open http://www.Google.com
2. Enter Any search query in the Text Box.
3. Click Search Button
Selenium Webdriver is nothing but set of API which can be used to automate your web Application very fast and easily.
So lets Start and Create our First JAVA Programme using Selenium Webdriver !!!!!
Important Note: I am writing this for the Very beginners in java and selenium.
First you Need the following list of tools on you machine1. Eclipse http://www.eclipse.org/downloads/
2. JDK http://www.oracle.com/technetwork/java/javase/downloads/index.html
3. Selenium Webdriver Jar file http://selenium.googlecode.com/files/selenium-java-2.33.0.zip
4. Firefox Browser should be installed.
That's It !!!!!!!!!!!!!!!!!!!!
Step: First
Install the Downloaded Eclipse and JDK on you local machine.Step: Two
Launch Installed Eclipse and you will see the Following Screen...Select the Java Prespective from the List of Different Prespectives, like below...

Step: Three
Now Java perspective is open You Need To create a Java Project.Click File -> New -> Java Project
Now You can see a New Java Project Dialog is open.
Enter Java Project you want to create like Example: FirstProject and Click Finish...

Now You have Successfully create a Project you can see that on you Package Explorer View.
Step: Four
We need to Create a Java File in this Newly created project.Select the Java Project -> Right Click -> New -> Class
Enter the Name of the Class File You want to create like Example: FirstWebDriver and click Finish..
After Finish You can see Default Package With the Class you have given is Created.


Step: Five
Now our java programme have been create, we need to include the Webdriver jar file we have downloaded.Note: to use webdriver API in you programme you need to include the Selenium webdriver jar file to your Build path of Eclipse.
Select You Project -> right Click-> Build Path-> Configure Build Path...
You can see the Properties for you Java project dialog is open..
Select libraries TAB and then Click -> Add External JARS....

Now You need To give the Selenium Webdriver JAr file Path you have already downloaded in your machine and click OK.....
Great !!!! We are Almost ready to Start with the Programme...................
Step: Six
So Selenium Webdriver Jar file Path is Set and we can use the methods, So lets START...........
First let me tell you ,What we are going to Do in this First Basic Programme...
1. You are going to use Webdriver to open http://www.Google.com
2. Enter Any search query in the Text Box.
3. Click Search Button
import org.openqa.selenium.By;
import org.openqa.selenium.WebDriver;
import org.openqa.selenium.firefox.FirefoxDriver;
public class FirstWebDriver {
public static void main(String[] args)
{
//Create a Variable of Webdriver Interface and an instantiate FirefoxDrive.
WebDriver driver = new FirefoxDriver();
//Using the driver object open Google.com
driver.get(http://www.google.com);
// Just enter the query string in the Google search input box
driver.findElement(By.name("q")).sendKeys("Selenium");
//Click Google Search Button
driver.findElement(By.id("gbqfba")).click();
}
Step: Seven
Now the Programme is ready to launch and show you the magic of Selenium Webdriver.
After that the programme will launch Firefox and start the Search on Google....................Enjoy !!!!!
Thanks for Reading ......
What is Coming Next...............
In Coming Blogs I will Try to Explain Each and Every basic concept regarding JAVA, Selenium Webdriver, Eclipse, How to write TestCases, Use of TestNG/Junit.

I just found this blog fantastic.It is very helpful for beginner.content of this blog is realy meaningful..
ReplyDelete